
Hello again everyone and HAPPY AUSTRALIA DAY to all my Aussie readers. I hope you have had a fantastic day wherever you are in our great southern land. Today, I have a little altered canvas to share. This was a pretty quick and easy project. I have just covered a 6x6 art canvas with some natural hessian/burlap and with hubby's help stapled it all to the back.


I have taken some scraps from last weeks file folder mini album and ripped the edges.

I was after a thinner, more tissue look to the paper so I have gently rubbed the back of the paper with a baby wipe to dampen the paper.

Then I used my finger to gently rub the layers away.

I kept doing this till I had a chieved the look I was going for. Be careful doing this guys...I rubbed a little to hard in places and actually ended up with a few holes, which wasn't any major drama really as I was going for a vintage/distressed look.

Once I was done I set the paper aside to dry and set to work on the hessian canvas.

I gave the edges a dry brush with some diluted gesso.....

Then a liberal coating of Mod Podge...

I also gave the paper a liberal coating too ;)

I then VERRRRRRY gently lifted the paper and adhered it to the canvas and applied another generous coat of Mod Podge....

I let this soak for a little bit, then grabbed my stipple brush and began to pounce the paper into the weave of the hessian.


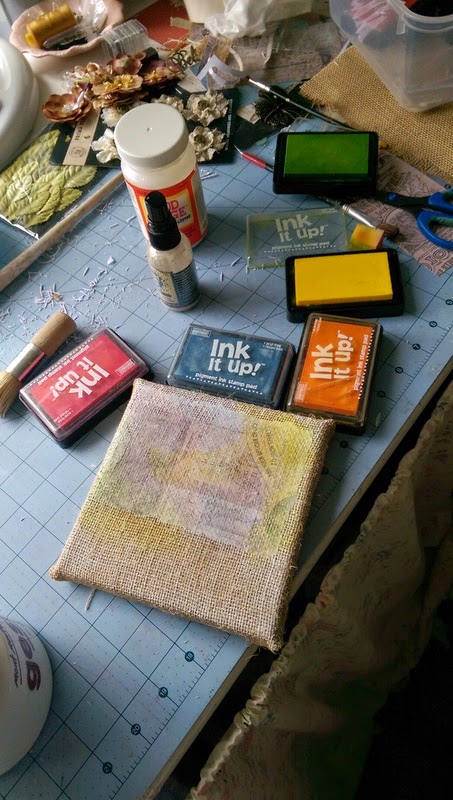
I set this aside to dry. Lucky it is summer down here and I didn't have to wait too long before I could get back to creating....Once it was dry I added some gesso - undiluted this time - to the edges


and then it was time to get inky with it...I pulled out some of my pigment ink pads and added some colour.
Then spritzed it with some Perfecr Pearls Mist - Biscotti. I love this stuff and use it all the time...It adds a nice shimmer with changing the colours too much... I also love how as it soaks in it blends the pigment inks together.

My next step was to add a generous coat of gesso to an antique filligree butterfly

and spray it with some Lindy's...but I wasn't that happy with the colours, so I ended up using some alcohol inks in aqua and pink sherbert, whic you will be able to see in the glamour shots below.

I have cut some flowers using the Tim Holtz, FLower Garland die and coloured them with the pigment inks

Then I began to play with the layout.....added some rubons, washi tape and some vintage ephemera that co-ordinated with the Madame Payroud collection. I have added a saying, and the chipboard word came from one of my previous kits.


Once I was happy with where everything went I quickly glued everything down before I changed my mind....I also printed off the saying, inked up the word strips with some Tim Holtz distress inks in Tea Dye and Walnut Stain.

So readers here are all her "glamour" shots......


I do hope you have enjoyed my little altered canvas today and I hope have inspired you all to dive into your stash and play around with what you have!! Thanks for stopping by and don't forget to check out all the Mad About Scrappin links below.
✿ღ.~♥ Much Love ♥~ღ.✿


No comments:
Post a Comment